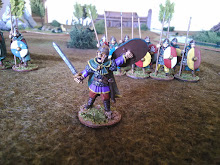
This was my first time writing a scenario for FoF and my first time playing the game. Some things needed changing as we went through the game and the are noted in red.
Game 1: Scouting
Kartat
Overview: 101st
Airborne Division (out of Fort Campbell KY) is making a push into Nangarhar Provence,
NE Afghanistan along the Pakistani border. As part of this push the 327th
Infantry Regiment, 1st Brigade Combat Team (BCT) "Bastogne" is
sending out a small unit to scout and assess the Taliban presence in the
village of Kartat that lies within a mile of the Pakistani border.
Game Length: 6
turns [This ended up being to short so would recommend 8-10 turns]
Table setup: Set
up a few buildings along one edge (within 12in). Place a small defensive
landmark in table center (this is point US units must reach). Place hot spot 1
& 5 on center table length edge, flanking center land mark. Place hot spot
2 & 4 along table edge, halfway between table center and corners of
village. Place hot spot 3 on center of table edge in village. Place scattered
crops, walls, and vegetation between village and opposite table edge.
Deployments: US
forces deploy within 6in of edge opposite village. In start of turn 2 deploy 2
Taliban cells at hot spots and 2 in turn 3 [we had the first 2 cells come on in start of turn 2 and a 5th cell in turn 4 as the game seamed off balanced]
Initiative: US
have initiative for turns 1 & 2, and then test in turn 3 and on.
Special Rules:
Taliban Special Abilities:
1. Cavemen
CASEVAC FOF pg135
2. Elusive FOF
pg135-136
3. Out of
Contact Movement FOF pg32
US
Assets:
1. Medic FOF
pg.51-52
2. Drone on
Station
US Mission:
proceed to the edge of the village and remain for 1 turn to probe for a Taliban
presence then return to base to
report. Avoid getting caught in a prolonged pitched battle.
US Victory Conditions:
-At least 1 combat effective Fireteam remained at least 1
turn at observation point. 5pts
-At least 1 combat effective Fireteam exits after
observation complete. 5pts
-No friendly POWs at game end. 5pts
-Entire squad exits, with dead and wounded, by game end.
5pts
- Each enemy KIA. 1pt
US Forces:
Army Airborne: TQ D8; Moral D10;
Confident; Supply level: normal; Initiative level D8; Body Armour: normal (1D)
BCT Squad One
1 x Squad Leader w/M4
Fireteam Alpha
1 x Fireteam Leader w/M16A4
1 x Grenadier w/M203 (Lt.
AP:1/AT:0)
1 x Gunner w/M249 (Lt. AP:1/AT:0)
1 x Rifleman w/M16A4
Fireteam Bravo
1 x Fireteam Leader w/M16A4
1 x Grenadier w/M203 (Lt.
AP:1/AT:0)
1 x Gunner w/M249 (Lt. AP:1/AT:0)
1 x Rifleman w/M16A4
Fireteam Charlie
1 x Fireteam Leader w/M16A4
1 x Grenadier w/M203 (Lt.
AP:1/AT:0)
1 x Gunner w/M249 (Lt. AP:1/AT:0)
1 x Medic w/M16A4
Taliban Mission:
kill, seriously wound, or capture as many infidels as possible.
Taliban Victory
Conditions: [Recommend changing KIA to 10pts, Seriously wounded to 5pts, and add lightly wounded for 2pts. to better balance the point system]
-Per POW captured. 10pts
-Per enemy KIA. 5pts
-Per enemy seriously wounded. 2pts
-Per enemy unit reduced below half strength. 1pt
Taliban Forces:
Hard-core Taliban: TQ D6; Moral
D10; Act as Regulars; Confident; Supply level: normal; Initiative level D8; Body
Armour: N/A
Taliban Cells x4
1 x Leader w/AK
1 x Gunner w/RPG (Med. AP:2/AT:1)
and AK
1 x Gunner w/LMG (Lt. AP:1/AT:0)
3 x Regulars w/AK
Here is a rough map of the set up:

Turn 1 the US forces has initiative and moved up the table taking cover behind the farm walls.


Turn 2. US win initiative and move Fireteams Alpha and Charlie up to the observation point

The Taliban 1st Cell comes on at Hot Spot 3 and moves into a building on the other side of some trees from the US and exchange fire. The 2nd Cell comes on at Hot Spot 1 and takes cover behind a tall wall, out of the US line of site

Turn 3. US win initiative and Fireteam Charlie moves into the left building while Alpha took the right. Fireteam Bravo took up the left flank but took 2 casualty (resulting in a KIA and Lightly Wounded) from the 3rd Taliban Cell that came on at Hot Spot 5. They in turn later wiped out that Cell.


The 4th Cell came on at Hot Spot 3 and moved up to a building flanking Cell 1. Cell 2 moved around the wall and with Cells 1 & 4 poured devastating fire into Fireteam Alpha causing 3 casualties in all but taking numerous losses themselves. The 5th Cell came on at Hot Spot 1, perfect to reinforce Cell 2.


Turn 5. Fireteam Charlie (with the Medic) made a risky dash between buildings to get to Alpha. They made it across the open but once in the build took a casualty.

Cell 5 started working their way around the right flank of the US position.

Turn 6. The Medic in Charlie checked everyone out and between both teams there where 2 Lightly Wounded and 2 Seriously Wounded. The remaining, combat effective members managed to nearly completely wipe out Cells 1, 2, & 4 but where effectively pinned due to number of wounded and their isolated position.

Cell 1 trying to advance on the wounded Americans but getting mowed down in the process.

Turn 7. Cell 5 flanked the US and attacked the weakened Bravo Fireteam, blocking off the US escape route.


At this point we had pass the 6 turn limit and decided to tally points. The US accomplished half its mission but managed to remove 23 Taliban from the field. The Taliban, while suffering heavy losses, inflicted 1 KIA, 2 Serious Wounds, and 3 Light Wounds. We did not feel the victory points fairly represented their success. In real life an American death and 5 wounded would have made the news, not to mention that they probably would have needed to been extracted which would tie up even more US assets.
All in all game one went well and was fun. The rules took some getting use to but even one of the new club members, who had never looked at the rules pyre, was able to pick it up and enjoy it. After this game we set up for game 2.


1 comment:
Good read!
Post a Comment