Here is Game 2/Mission 2 from my camping that we played today a the club.
Game 2: Rescue at Kartat
Overview: After the scouting mission of Kartat village, US regional
command determined that Kartat was being used as a Taliban stronghold. As a
result a Special Forces (SF) team was sent into the area to identify potential
high value targets. During the second day a patrolling Taliban cell stumbled
upon the SF team's position and they had to fight their way to an extraction point.
During the confusion one of the SF operatives got separated and did not make it
to the extraction point and the helicopter and to pull out due to increasing enemy
fire. The SF member managed to radio that he was hiding in a nearby build but wounded and unable to reposition. A squad from the 1st BCT that was
on patrol in the area has been redirected to find and extract the SF member,
Dead or Alive. [we changed it to be a pilot who had gone down in the area of Kartat because we had a beautiful running pilot figure at our disposal and it seem a shame not to use him]
Game Length: 8-10 turns
Table setup: Set up 4-6 buildings evenly scattered across the table
with vegetation and walls between. Place 4 markers numbered 1-4 face down and
randomly on the tops of 4 buildings so that no player knows which numbers are where.
Roll a D8, this will determine a random and secret location of the SF member. A
roll of 1-2 means marker 1, 3-4 marker 2, 5-6 marker 3, 7-8 marker 9. Set up
hot spots according to map. [we ended up using 5 markers instead of 4. This system seemed to work ok but other, potential better, suggestions where made]
Note: To locate the SF member and unit must enter a building with a
marker on it. Once the entire unit is inside that player may look at the marker
to see if it is the number rolled in setup. If it is then on the fallowing turn
the player will perform a first aid check to see the condition of the SF
member. For Taliban the SF member will be treated like a POW dependent. For US,
if determined he is lightly wounded or not wounded, he will join that unit as a
fighting member. If seriously wounded or KIA then treat accordingly. [we decided that the player could keep the result of the marker to themselves but if the unit had the pilot and passed in the opponents line of site or exited the table with the pilot then they had to say they had him]
Initiative: Test as normal each turn.
Deployments:
US forces will deploy
with 6 in of 1 table adage. Taliban will start with 1 cell in center of
opposite half of table from US. The rest of the Taliban forces will deploy at
hot spots based on rolls from the reinforcement list.
US Mission: Search the buildings that the SF member is suspected of
hiding in, asses his condition, and escort him off table.
US Victory Conditions:
-SF member escorted off
table by game end alive. 10pts
-SF member escorted off
table by game end KIA. 5pts
-Each enemy KIA. 1pt
US Assets:
1. Medic
FOF pg.51-52
2. Weapon
Team FOF pg.137
3. Designated
Marksmen FOF pg.135
4. Drone on
station.
US Forces:
Special Forces
Member (when attached to US unit): TQ D10; Moral D10; Confident; Supply
level: normal; Initiative level D8; Body Armour: normal (1D)
Army Airborne:
TQ D8; Moral D10; Confident; Supply level: normal; Initiative level D8; Body Armour:
normal (1D)
BCT Squad One
1 x
Squad Leader w/M4
1 x
Medic w/M16A4
Fireteam Alpha
1 x
Fireteam Leader w/M16A4
1 x
Designated Marksman w/Mk12/Mk14
1 x
Gunner w/M249 (Lt. AP:1/AT:0)
1 x
Rifleman w/M16A4
Fireteam Bravo
1 x
Fireteam Leader w/M16A4
1 x
Grenadier w/M203 (Lt. AP:1/AT:0)
1 x
Gunner w/M249 (Lt. AP:1/AT:0)
1 x
Rifleman w/M16A4
Weapons Team
1 x
Gunner w/M240 (Med. AP:2/AT:0)
1 x
Assistant Gunner w/M16A4
Taliban Mission: Capture the SF member alive so he can be executed
on film later but dead is ok too. Capture, Kill, or Seriously Wound as man infidels
as possible.
Taliban Victory Conditions:
-SF member escorted off
table by game end alive. 10pts
-SF member escorted off
table by game end KIA. 5pts
-Each enemy POW. 3pts
-Each enemy KIA. 2pts
-Each enemy Seriously
Wounded. 1pt
Taliban Special Abilities:
1. Cavemen CASEVAC FOF pg135
2.
Elusive FOF pg135-136
3. Out of Contact Movement FOF pg32
4. Weapon Team FOF pg.137
5. Sniper Team FOF pg137
Potential Taliban Forces:
1. Hard-core
Taliban: TQ D6; Moral D10; Act as Regulars; Confident; Supply level: normal;
Initiative level D8; Body Armour: N/A
2. Local
Taliban: TQ D6; Moral D8; Act as Irregulars; Low Confidence; Supply level:
normal; Initiative level D8; Body Armour: N/A
Starting cell: Hard-core
Taliban
1 x
Leader w/AK
1 x
Gunner w/RPG (Med. AP:2/AT:1)
4 x
Men w/AK
Reinforcements:
Roll D10
1--- 1D6 Hard-core
Taliban w/AK
2--- 1D6 Local Taliban
w/AK
3--- 1D6 Hard-core
Taliban x 1 Leader w/AK
4--- 1D6 Local Taliban
x 1 Leader w/AK
5--- 1D6 Hard-core
Taliban w/AK 1 x Gunner w/RPG (Med. AP:2/AT:1)
6--- 1D6 Local Taliban
w/AK 1 x Gunner w/RPG (Med. AP:2/AT:1)
7--- 2D6 Local Taliban
1 x Leader w/AK 1 x Gunner w/RPG (Med. AP:2/AT:1)
8--- 1 x Local Taliban
PKM Gunner (Med. AP:2/AT:0), and 1 x Assistant Gunner w/AK
9--- 2D6 Hard-core
Taliban w/AK 1 x Gunner w/RPG (Lt. AP:1/AT:2)
10- 1 x Hard-core
Taliban sniper with Dragunov SVD and Spotter w/AK
[we really liked the reinforcement setup as it really lent to a variety of units on the table. In this game the Taliban tended to roll well and frequently got the max number of units they could each time]
Rough map of the table set up.

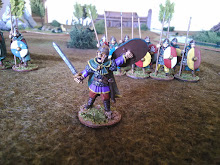
Was a little more caught up in this game so did not get very many progressive photos as I would have like.
Started off with the US deployed on one end and the 1st Taliban Cell just on the other side of the compound in the center.


The 2nd Taliban Cell (6 Local Taliban with Leader) came on at Hot Spot 5, to the right of the US deployment, and took casualties from Bravo.


The Taliban got another Cell of Hard-core Taliban and a Sniper with spotter, the latter of which harassed the US right flank but was unable to inflict any casualties.


This game also went well and much more smoothly as we had a better feel for the rules. However I do feel that the spread of the markers made it much to easy for one side to get lucky and snatch the pilot without the other having any chance to stop them.


No comments:
Post a Comment