Showing posts with label WIP. Show all posts

Wednesday, February 9, 2022

Display Board pt5

 All the flocking is dry and complete and I have set up all the initial terrain I plan to use for the display. I'm still waiting on the water effects to arrive so I can add some in the ruts. I also need to add some glue to the thatched roof to get it to lay down. Initially I'll use it to display my Bolt Action German force in a tournament next month. I'm hoping to win best themed. I have left the buildings and other terrain elements removable so that I can customize it for skirmish games. Replacing the buildings with some half timber framed Saxon ones would make it work perfect for a skirmish battle. Could use it with Fistful of Lead rules Might and Melee set in early to mid medieval. I could put trees over the area were the log piles are to make the edge of a forest and run an ambush scenario. 

Overall I am very happy with this. I learned a good deal and think I could make more tiles that go together. I didnt make this specific one with that though in mind so it might be hard to integrate it into others but it served as a good proof of concept. 


Tuesday, February 8, 2022

Display Board pt4

Today I got the flocking done on my display/skirmish board. I used Army Painter flock and Huge Miniatures static grass and flowers. Glue is still drying in these photos so you can see it a bit through the flock. Next I'll add some water effects in the ruts. I decided not to flock the smaller fenced area so it could be used for live stock while the larger one will be a garden.


Sunday, February 6, 2022

Display Board pt3

 For the texture I added sand over the entire board though I used a coarser grit for the "wild" areas and a fine grit for the road and yards. I imagine the difference being the pulverized sediment from traffic, both foot and vehicle. 

Once the glue had dried I painted over all of it using  craft smart Brown. Then a heavy dry brush of Golden Brown. I went back over the fine grit areas with a final dry brush of Khaki for a more exposed and dry look. 

Next will come the flocking.


Saturday, February 5, 2022

Display Board pt2

Next I took a sheet of 1/2 inch foam and cut it to cover everything except the roads, houses, and yards. Then I beveled the edges with my dremel and sanding tool. I wanted the roads to have a sunken and warn look. The house will be left removable for transport, storage, and use in other setups. 
Next I glued on the 3d printed fences where I wanted them to go.


Friday, February 4, 2022

Display Board

 I will be playing in my 2nd Bolt Action Tournament this coming March and it will be a 750pt Combat Patrol game. In addition the the lower points cap. All vehicles must be open topped and a 7+ armor or less. I decided to go with a German Anti-Partisan Force themed on the Eastern Front. I'll do a separate post about the force composition but in edition to the 5 vehicles and 29 miniatures I need to paint I have decided to also build a 2 foot by 2 foot display board for them. 

I started with a standard 2in thick 2x2 foam insolation panel from local hardware for the base. I then set out some of my Eastern front 4 Ground buildings from my WW1 collection and some 3d printed terrain. Next I laid out the part of the force I have and played around with the narrative I wanted it to tell. 


When I had a good idea of a vision I removed the miniatures and traced out all the terrain elements to make a template of my idea. I want to display a small cross roads and farm stead where the patrol has stopped and engaged partisans (I plan on make some dead partisan minis). 


The first element I began construct were the ruts in the roads. I wanted these to be cut into the board and to show their heavy use on a dirt road. I used a foam wire cutter to carve them out and then ran some sand paper along the sides.


I made the ruts wider so that when I add dirt and texture they should fill in to the desirable size. 


Saturday, November 6, 2021

Anglo-Saxon army WIP review

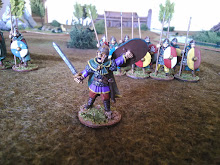
 I decided to lay out my Anglo-Saxon army in its entirety to see how my progress was going. Overall I'd say I'm just a tad under half way done. I have been working hard on it now for a couple of months and it is motivating to see what I am working towards, a fully painted army in all its glory. This is the first army I have fully planned out its end strength and actually have it all fully assembled. There is just something exciting about seeing a fully arrayed battle line. In the first photo I added a brake down of each Division as its set up for Hail Caesar. 


I also took the following photos on my small display board but had the Skirmisher distribution wrong.


This is the King's division as it has his personal Huscarls armed with Dane Axes. They will actually only have 1 unit of Skirmishers.
The following two divisions are identical.


re-basing

My Anglo-Saxon army was originally intended for the skirmish game SAGA. Since I decided to expand it for large force rules like Hail Creaser I needed to re-base the existing models. I just finished rebasing all the unarmored models I had and added banners to each unit. They are a mix of metal minis from Footsore Miniatures and Crusader Miniatures and some plastics from Wargames Factory.


Wednesday, March 24, 2021

Old Growth Forest WIP

 For my French and Indian War games I have been unsatisfied with the quality of forest I can put on the table. So for the F&IW and earlier I will be making an Old Growth Forest. One thing I dont do enough when I embark on a terrain project is planning. I'll often to some research on what it should look like but not laying it out before hand. To get this project right I'll spend some time working on a plan, mostly focusing on a template for the layout.

First I gathered some reference photos with a google search.


Next I gathered information about the structure of an Old Growth Forest.


I then gathered up the trees I had printed up in 2019-2020


I took 4 pieces of A4 paper and taped them together to make a big sheet. Then I took some time to arrange the trees in a way that would look good but be playable. When I settled on a layout I traced the position of each tree then worked out where the shape of the base and of the removeable canopy. 


The next step will be to cut the triangular shape out of MDF. The canopy shape will be cut out of 2in foam insolation and then flocked with clump foliage.